|
On…August 10, Ponceau, in the Quai d’Orsay, advised Isvolsky [the Russian Ambassador] of Turkish fears about Russian designs on the Straits. Ponceau told Isvolsky “that it might be advantageous for us to draw Turkey to the number of our enemies in order to make an end of her.”
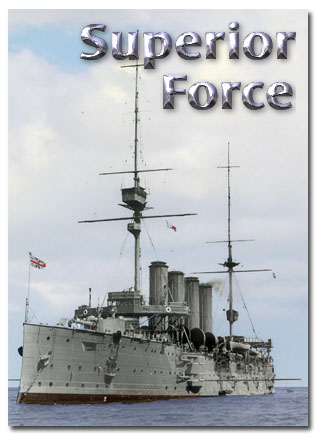
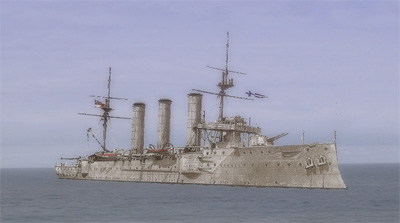
It seems to have surprised even the German Embassy to discover that Mallet [the British Ambassador to the Sublime Porte] had confided to a Swedish colleague that Britain let in the German ships because she had a “lively interest” in not allowing the Straits to fall into Russian hands. Late on the afternoon of Monday 10 August 1914 the German battle cruiser Goeben, accompanied as always by her faithful consort, the light cruiser Breslau, appeared on the horizon off the entrance to the Dardanelles. As the ships steamed past the ancient battlefield on the plain of Troy the trailing British Mediterranean Squadron was left floundering, far away in the western Aegean, with no real clue as to the whereabouts of the foe they had been pursuing for a week. Admitted into the sanctuary of the Straits after German pressure had been applied to both the Turkish Minister of War, Enver Pasha, and the unwilling Grand Vizier, Said Halim, the German ships had successfully completed a remarkable escape; but escape to where? To venture once more outside the Straits invited certain retribution at the hands of the British, who arrived in force on 11 August and remained on guard for the rest of the war. Goeben’s fighting days were not, however, over for, at the other end of the Straits, lay the Black Sea and the coast of Russia — Germany’s enemy. For a section of the Turkish Government the presence of the German ships, commanded by the aggressive Admiral Souchon, was a mixed blessing; for the British the lamentable episode of the ‘escape’ of the ships was a disaster of the first order. Due to shifting allegiances, Britain’s status as a Mediterranean power had changed considerably in the quarter century prior to the outbreak of the First World War. In 1888 the French, at the time the most likely enemy, concentrated ironclads at Toulon in a move directed at Italy. The Admiralty, unaware of the actual motive, and believing the redistribution threatened the British Mediterranean Squadron, panicked; in July, the Naval Lords were instructed to report on the requirements of the fleet should war break out with France. The agitation reached a climax in February 1889 with the presentation of the Report on the Naval Manoeuvres which forced the Government’s hand and led to the passage of the Naval Defence Bill, authorizing the building of 10 battleships, 42 cruisers and 18 torpedo boats over a five year period. By November 1889 the strength of the Mediterranean Squadron had been increased to meet the putative threat. Within two years, however, the French fleet was again stronger. It did not take long for perceptive commentators to realize that, rather than create a hostage to fortune by virtue of a large, and ever growing, fleet stationed at Malta, it might be preferable to evacuate the Mediterranean altogether and instead block the enemy’s fleet inside. In 1895 a series of articles began to appear whose general tenor was summed up by the title of William Laird Clowes’ essay, referring to the Mediterranean as The Millstone Round the Neck of England. Ironically, and unbeknownst to the authors of these articles, Admiralty policy since 1888 had been to concentrate the Mediterranean fleet, at least in time of war, at Gibraltar — a clear indication that, as it stood, the position of the squadron was untenable. What saved the situation was the inability of the French to match British shipbuilding after the introduction of the Naval Defence Act; faced with the twin threats of the British navy and German army, and unable to compete financially with both, the French chose to invest their money in the military. The French naval estimates remained static between 1894 and 1896 and actually decreased in 1897. By the time of the Fashoda crisis the following year the French fleet was comprehensively outgunned. When Admiral Fisher, a previous Commander-in-Chief, Mediterranean, was appointed First Sea Lord in 1904 a series of radical developments designed to maintain Britain’s naval supremacy was instigated, not the least of which was the introduction of the class of ship that should be forever associated with his name: not, as would commonly be imagined, Dreadnought, the first all-big-gun battleship; but Invincible, the first battle cruiser, a concept much closer to the Admiral’s heart. By 1910, when Fisher had retired as First Sea Lord, the Mediterranean had become for the British an Anglo-French lake; in the intervening decade the strategical situation had been eradicably altered by the entente cordiale of 1904. Following this official understanding, a secret British commitment entered into with the French, falling not far short of an alliance, had resulted in France assuming control for all but the eastern basin of the Mediterranean, while – the only cloud in an otherwise blue sky – Italy and Austria-Hungary, those most unlikely of allies, vied with each other to construct the latest dreadnoughts. What these indigenous Mediterranean navies lacked however, was an example of Fisher’s ideal: a ship powerful enough to destroy any lesser ship yet with sufficient speed to outrun anything capable of sinking it — the fast, lightly armoured, all-big-gun battle cruiser. When the first of these ships was built in England only Germany, initially and after some delay, rose to the challenge. The new class though raised as many questions as it answered: what would its position be in the line of battle? Would it be true to maintain that the only ship that would ever be capable of destroying a battle cruiser in all circumstances would be another, but more powerful, battle cruiser? Concomitant with the advent of these ships was the tremendous increase in the range of the modern naval gun. By combining speed with the capability of long range firepower the lone battle cruiser roaming the oceans would present a considerable danger to an opposing navy as well as being a grave menace to the trade routes. As the threat posed by the new German navy became increasingly clear in London, the Liberal Government, hemmed in by financial constraints and seeking to initiate radical social reforms, faced the appalling prospect of a naval arms race spiralling hopelessly out of control. The options available to meet this threat were, of necessity, limited: construct new ships, at enormous cost, to meet the challenge and maintain British naval superiority, or reorganize the present fleets to concentrate the greatest force in the North Sea, facing the one clear threat. Certain assistance was rendered by the Dominions – New Zealand presented a battle cruiser and Malaya a dreadnought to the Royal Navy as a contribution to Imperial defence, while Australia formed a powerful battle group as the core of her new navy, relieving the pressure of the mother country in the defence of that station. The greatest contribution should have come from Canada; however the chimerical Canadian dreadnoughts became more in the nature of a cruel taunt, holding out the promise of relieving an onerous burden but never eventuating. Ultimately, the British position in the Mediterranean would have to be examined in the minutest detail in view of the threat in the North Sea. The mere mention of a British withdrawal from the middle sea roused passions; the arguments, which had originally been advanced in the 1890s, were hotly debated again in 1912 when Churchill, who was then at the Admiralty, proposed (following the advice of his First Sea Lord, Prince Louis of Battenberg) that the Malta battleships should be withdrawn. Churchill’s original scheme went too far and, in a climbdown forced upon him by the Committee of Imperial Defence (and which fed his determination to circumvent that body in future), a compromise solution was arrived at: in the interim, battle cruisers would be sent to safeguard Britain’s position in the Mediterranean. In 1914 the only German battle cruiser outside of the North Sea was Goeben but her advantage was nullified to some extent by virtue of being trapped in the Mediterranean on the outbreak of war. With only two exits from that sea and no fewer than three British battle cruisers on station at Malta, Admiral Souchon’s task seemed impossible. The best he could seemingly hope for was a dash for Gibraltar and either a short life as an Atlantic commerce raider, or an ignominious return journey to the North Sea; failing that he could choose to join his Austrian allies in the Adriatic and so be condemned, in all probability, to a war of enforced inactivity. Souchon followed none of these courses, deciding instead on a perilous flight to Constantinople the repercussions of which could hardly have been anticipated during the fraught days of a simmering August as he strove to keep one step ahead of the British. Whatever Souchon’s private thoughts as to the likelihood of his reaching his destination unharmed, there is now available unquestionable evidence that, for a multiplicity of motives, the Admiral made good his escape only by virtue of an organized conspiracy in Athens, both to supply his ships with coal and to withhold vital information from the British. This conspiracy – at the highest levels – almost certainly included a serving British Rear-Admiral. The Ottoman Empire had also experienced a fundamental change since the military defeat at the hands of the Russians in 1877. The lurid western image of the Sultan, Abdul Hamid (universally known as Abdul the Damned), masked certain advances that had been made and which looked likely to continue, albeit at a snail’s pace. These reforms however could not come soon enough to head off the pressure building from within the Empire and which exploded in 1908 with the Young Turk revolution. Initially with limited aims, the Young Turks and, in particular, the inner circle forming the heart of the party – the Committee of Union and Progress – would increasingly stand at the centre of Turkish politics, for good or evil. As with other reformists, the Young Turks looked beyond their own borders for help in the task of modernizing the Ottoman Empire. The German Emperor had already demonstrated his willingness to assist, his overt altruism as always underpinned by hard commercial and strategic logic. Sir Edward Grey, the British Foreign Secretary, also made soothing noises in London and, for one brief shining moment, British stock in Turkey rose to unheard of heights culminating in a spontaneous public display of approbation when the new Ambassador, Sir Gerard Lowther, arrived soon after the revolution. The pieces were there to be picked up; but Lowther would not stoop. Malign influence from within the Embassy, together with his own haughty personality, combined to bankrupt the British stock and leave the way open for Germany. Nevertheless, it should not be thought that the scheming Teutons then proceeded to coerce the Turks to their bidding; for the Turks could be equally scheming. The end result – Turkey’s entry into the war as an ally of Germany – owed more to the machinations of Souchon and Enver than it did to the prevarication of the less rabid members of the Committee of Union and Progress who had hoped to use Germany until it was felt the moment had arrived when Turkey could be admitted as a fully paid-up member of the international club and join the exclusive coterie of nations entitled to be described as Powers, with all the majesty denoted by that imposing capital letter. As part of this grand scheme, and at Turkish invitation, Britain undertook the onerous task of modernizing Turkey’s navy; Germany reformed her army; France contributed most financially. Despite this, the Ottoman Empire in the early twentieth century was still an unwieldy product of past glories with glistening fruits at the extremities which were ripe for the plucking. The power base of the Young Turks was too narrow and, while the heart beat more strongly in Constantinople after the revolution, the effect was too late to save the atrophied limbs. When trouble struck the new regime at the Sublime Porte in 1911 (the certainty of which was only partly offset by the surprise felt that it should be the Italians who began the process of dismantling the Empire), the Young Turks turned to Britain for an alliance; they were rebuffed. Further approaches were made, all with the same result. But Grey did not write Turkey off: after the disappointing tenure of Lowther, one of the rising stars of the Foreign Office, Sir Louis Mallet, was dispatched as Ambassador with a remit to repair the damage done by Lowther. This Mallet attempted to do. That he was, ultimately, unsuccessful was due more to a combination of the sinister forces that continued to operate within the British Embassy at Pera and a fatal defect in Mallet himself: seeing what he wanted to see. The flattery lavished on his hosts was used against him; paternal and gullible in equal measure, Mallet’s mission was a failure. Whether it could have been otherwise if more support had been forthcoming from London is problematical. By the Spring of 1914, having weathered the Turco-Italian war and both Balkan Wars, the Turks could be forgiven for thinking that their erstwhile saviours were now poised to deliver the coup de grâce — what the minor powers had failed to accomplish, the major powers would finish. All it would take was for one of them to make the first move; each power had its particular area mapped out dignified by such names as ‘sphere of interest’ if little else. In a last ditch attempt to forestall the inevitable the Turks turned to Russia. Nothing could have better illustrated the innate weakness of the Turkish position. In the circumstances Russian suspicion and the pressure of events resulted in the final, fatal adherence to Germany. Even here the outcome might have been different: the German Ambassador to the Porte reported ruefully on Turkey’s usefulness as an ally and was over-ruled; the Turks themselves pursued a course of delaying for as long as possible the moment when the debt incurred following the signature of the Turco-German Treaty of Alliance on 2 August 1914 would be called in. This begs the question, for how long could the Turks have kept up the pretence had their hand not been forced by Admiral Souchon? The episode of Goeben and Breslau ruined many a reputation. The first to suffer were Admiral Sir Archibald Berkeley Milne, Commander-in-Chief of the British Mediterranean Squadron, and Rear-Admiral Sir Ernest Troubridge, commanding the First Cruiser Squadron, who abandoned the attempt to intercept the German battle cruiser with his lighter ships. Troubridge was court-martialled, acquitted (to the dismay of the Admiralty) and then dispatched, for his alleged sins, to Serbia. Milne spent the remainder of the war unemployed and has been portrayed ever since as an incompetent dandy who was better suited to the rigours of Court life than command of a fighting squadron. Captain Fawcet Wray, who was held to have influenced Troubridge in making his fateful decision, was ostracized. All three felt bitter at their treatment. Similarly, Mallet’s career was prematurely brought to an end. The longest fall however, if only because he had further to slide than anybody else, was Churchill’s. The First Lord of the Admiralty successfully avoided being tarred with the same brush as his naval commanders but harboured a secret enmity towards the Turks whose first manifestation was the order for a futile bombardment of the Dardanelles forts in November 1914 (before a declaration of war!) and which ended in the horrors of Gallipoli. Churchill, like the others involved, sought to invoke a higher defence to excuse the transgressions that were perpetrated: the coincidences were too numerous, too meaningful, to be otherwise than the product of fate. A close study of the events and the decisions faced by the participants is therefore essential to decide whether it is possible, in any sense, to say that the actions described were fated to happen. The current work is the first volume of a trilogy which, together, will examine the forces that resulted in Turkey’s entry into the war; it is, therefore, a precursor to the Gallipoli campaign and attempts, in particular, to explain the numerous errors of diplomacy, lack of strategic vision and tactical incompetence that, together, failed to circumvent the intentions of Admiral Wilhelm Souchon in August and October 1914 and so resulted in the slaughter of 1915. It delves into the mysterious goings on in Athens as Souchon was fleeing his pursuers and endeavours to prove that there was an organized conspiracy, involving an Admiral in the Royal Navy, to ensure that the German ships made good their escape. It will also chart the decline of the British Mediterranean Squadron from its apogee in 1902/3 to its position in 1914 as no more than a rump of the Royal Navy: a compromise force whose vulnerability against its likely foes was only offset by the questionable expediency of a moral commitment to France that was to have such a baleful influence in the counsels of August 1914. And finally, it will examine the origins of the Dardanelles campaign with particular reference to the continuing faction fighting in Athens and the part played by the Admiralty’s new-found dependence on oil and how this might have affected the complex reasoning behind the difficult strategic decisions that had to be made after Turkey’s entry into the war. There are few full-length treatments of British naval policy in the Mediterranean during this time as, also, little has been written describing in any depth British diplomatic policy towards Turkey. To my knowledge, the episode I have labelled The Greek Connexion breaks new ground. On the other hand there have been two full-length treatments, in English, of the escape of Goeben and Breslau. The first of these (by Redmond McLaughlin in 1974) has no pretensions and makes no claims; the second (by Dan van der Vat in 1985) is less satisfactory in that it aims to broaden the horizon but does so on too limited a range of sources; in addition there are errors of fact and interpretation for which the rationale cannot be ascertained as no detailed references are given. Any attempt to retell this particular episode must run up against the excellent and comprehensive account provided by the documents edited by Mr E. W. R. Lumby in his Policy and Operations in the Mediterranean, 1912-1914 for the Navy Records Society. While most of the documents therein could also be consulted at the Public Record Office, Mr Lumby was instrumental in obtaining access to the transcript of the Court of Inquiry into Troubridge’s conduct and the subsequent Court Martial. Without his efforts, these files would have remained closed for years. I have chosen to go down a different path to McLaughlin and van der Vat by eschewing a chronological format in the present work. In so doing I have taken evidence given at the Court of Inquiry and Court Martial, where it was used to explain actions and motivations, and have incorporated it in the main narrative in an attempt to illustrate more clearly how decisions were reached. Inevitably, anyone following the footnotes will – in the relevant sections – see the name ‘Lumby’ cropping up with monotonous regularity; nevertheless, I have tried to present a broader picture than is available solely through Lumby which, for example, does not mention the Greek connexion, and is not particularly concerned with the diplomatic side. In addition, I have checked all the dispatches, signals and reports in Lumby with the archives: in many cases the Admiralty minutes (generally not given in Lumby) are more illuminating than the message to which they refer! Important additional sources were provided by the Commander-in-Chief’s Signal Log in the Milne papers; the W/T Signal Log of HMS Defence at the Imperial War Museum; Captain Kennedy’s Narrative at the Liddell Hart Centre for Military Archives; and the private papers of Admirals Milne, Troubridge, Battenberg, Hamilton and Limpus. The crucial documents for the Greek connexion are available in the Athens’ Legation Archives at the Public Record Office. |